top of page
Portfolio
Infamous Second Son - Neon Drain FX in UE5
01:46

Infamous Second Son - Neon Drain FX in UE5

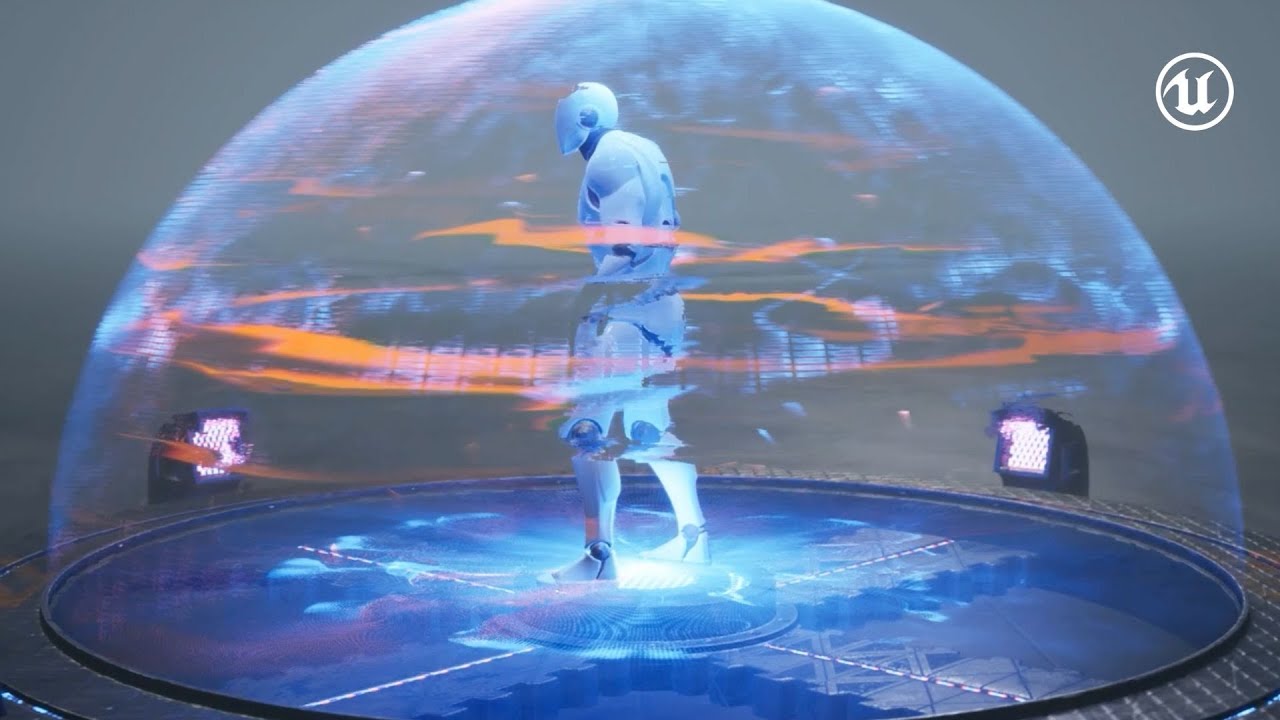
I was a huge fan of the Infamous series and remember being blown away when Second Son launched. Ever since I saw the 2014 GDC talk by Matt Vainio on the Games' FX, I've wanted to recreate a few of them. While going after Neon Drain I tried to stick to some of the original techniques Matt outlined in his talk (Sampling the texture color from the sign, rotating meshes on the character with depth buffer interaction and playing with curl noise on various emitters) while also implementing a few of my own. I wanted to stretch myself with this one and learn some new techniques while exploring some new features in Unreal Engine 5. I have huge respect for Sucker Punch and think they have some of the most innovative FX artists in the industry, hopefully I've somewhat done justice to these effects. So, here is my take on the Neon Drain FX with a couple additional tributes to the game. I even created a coffee shop brand to go along with it! Hope you enjoy my sense of humor... A HUGE thank you to Aaron Gallant for your amazing sound design skills and special shout out to Chris Meredith, Endre Eikrem, Miles Maxwell and Taku Wanifuchi for your advice and feedback along the way. Couldn't have pulled it off without you guys. Sound Design: Aaron Gallant - https://www.linkedin.com/in/aaron-gallant-08b71228/ Animation/Character: Mixamo.com Additional 3D Assets: CGTrader.com Programs Used: Unreal Engine 5, Niagara, Blender, Houdini, Substance Designer, Substance Painter, Photoshop, Matt Vainio GDC Talk - https://youtu.be/o2yFxPY2b1o?t=1053 More Details on ArtStation: https://www.artstation.com/artwork/B1xE48
One Texture VFX Art Test Trailer
01:14

One Texture VFX Art Test Trailer

I have been a 3D artist for many years now and I can confidently say that I haven’t found myself in a project, professional or personal, that didn’t have limitations. It doesn’t matter if they are technological, financial, time bound, a result of having to follow someone else’s vision or even a product of your own skill set. I’ve come to realize that limitations are and always will be a part of life as an artist, no matter how far along you are in your craft. So, I decided to revamp the way I tackle my personal projects and practice them with self-imposed limitations. What I found is that this actually helped me achieve a greater ability to focus, work faster and more efficiently and actually see more projects through to completion. By giving myself certain restrictions to work under I was more free to explore new areas of my craft and grow in skills that I wouldn’t normally focus on without having my crutches removed. So, I developed a little art test for myself with self-imposed limitations. The most extreme one being that I could only use one texture for every part of every effect in order to, again, enhance skills that I felt were lacking. Here is a teaser for all of the videos in the series. I hope you'll check them out and enjoy. Part 1 - Campfire - https://youtu.be/b2HT9eHxg3c Part 2 - Power-Up - https://youtu.be/vdIGkIV7vnc Part 3 - Muzzle Flashes - https://youtu.be/YYbq9S2eNNU Part 4 - Energy Shield - https://youtu.be/za_N2x1ScX8 Part 5 - Exploding Barrel - https://youtu.be/okp-paH_2tw Part 6 - Ice Projectile - https://youtu.be/sxkSif5-ulQ More Details on ArtStation: https://www.artstation.com/artwork/DA2WXG
One Texture VFX Art Test - Part 6 - Ice Projectile
03:59

One Texture VFX Art Test - Part 6 - Ice Projectile

So, here we are at the end of the journey. To recap, I used the same one texture for every part of all 6 effects. I created a 2K tiling texture in a way that would help me utilize it for multiple effects, from flames to ice and sci-fi energy shields. It pushed me to grow in skill sets I am weaker in and get away from the mentality of “it’s not possible” to “I will make it work.” So as much as I had to break through technical and artistic limitations, I had to break through mental ones as well. I had to rely on the material shaders to do a lot of the heavy lifting. This required me to turn the texture into Flipbooks through UV tiling of the RadialGradientExponential node in order to create smoke, sparks and snowflakes as well as using it for normal maps through the NormalfromHeightmap node. If it hadn’t been for self-imposed deadlines, sharing and reusing assets I created between effects and building out procedural systems I could iterate on, I would have never crossed the finish line. Thank you to all of the feedback and support I received from friends and colleagues along the way too. There’s a breakdown of some of the tricks I used for the one texture in the second half of this video. They are the same techniques I used for the other 5 effects as well. I hope you have enjoyed taking this journey with me as much as I have loved creating it. May you enjoy leveraging your own creative limitations. If you liked this series please let me know in the comments. I’d love to know if this helped anyone and if you’d like to see something like this again in the future. Limitations 1. Time: Complete the FX within 3 work days max (24 Hours) (Completed) 2. Project Constraints: Blueprints only no Level Sequencer. (Completed) 3. Extreme Limitation: The same ONE TEXTURE for every part of all 6 effects (Completed) Programs Used: Blender, Houdini, ZBrush, Substance 3D Designer, Unreal Engine 4 Credits: Sound Design by Brian Michael Fuller | Character Meshes from Mixamo | Music by NeuAcre Part 1 - Campfire - https://youtu.be/b2HT9eHxg3c Part 2 - Power-Up - https://youtu.be/vdIGkIV7vnc Part 3 - Muzzle Flashes - https://youtu.be/YYbq9S2eNNU Part 4 - Energy Shield - https://youtu.be/za_N2x1ScX8 Part 5 - Exploding Barrel - https://youtu.be/okp-paH_2tw Thanks to Ben Cloward for his awesome volumetric ice tutorial that helped me get started on the shader for this. You can find that tutorial here: https://youtu.be/X5WASspig3g More Details on ArtStation: https://www.artstation.com/artwork/DA2WXG
One Texture VFX Art Test - Part 5 - Exploding Barrel
03:42

One Texture VFX Art Test - Part 5 - Exploding Barrel

I downloaded a barrel from the Epic Megascans library so that I could have a mesh with better visual fidelity. I used Houdini for setting up a fracture pipeline which helped maintain the original UV layout for the outer shell while creating new UVs for the internal shell. I created a pipeline to export each piece as a separate mesh which I then imported into Unreal. Instead of spawning them as particles I set an impulse to launch them from their location around the barrel. I liked the look of the physics better this way. I was also able to load all of the pieces into an array in the BP and spawn the same particle system for each of them through a For-Each loop. I did some additional mesh work on the Bottom of the barrel in Blender which I took into Painter for additional texture work to give the barrel more of a scorch texture on the destroyed pieces. The last touch was adding an oil decal that pooled around the bottom of the barrel and one on top to justify the fire spreading over it when the barrel is kicked. This helped propagate the multiple levels of fire increasing leading up to the explosion. Limitations 1. Time: Complete the FX within 3 work days max (24 Hours) (Completed) 2. Project Constraints: Blueprints only no Level Sequencer. (Completed) 3. Extreme Limitation: One Texture for every part of every effect (Completed) Programs Used: Blender, Houdini, Substance 3D Designer, Substance 3D Painter, Unreal Engine 4 Credits: Sound Design by Aaron Gallant | Barrel mesh from Epic’s Megascans library | Music by NeuAcre Part 1 - Campfire - https://youtu.be/b2HT9eHxg3c Part 2 - Power-Up - https://youtu.be/vdIGkIV7vnc Part 3 - Muzzle Flashes - https://youtu.be/YYbq9S2eNNU Part 4 - Energy Shield - https://youtu.be/za_N2x1ScX8 Part 6 - Ice Projectile - https://youtu.be/sxkSif5-ulQ More Details on ArtStation: https://www.artstation.com/artwork/DA2WXG
One Texture VFX Art Test - Part 4 - Energy Shield
01:26

One Texture VFX Art Test - Part 4 - Energy Shield

It was a blast designing and executing a Sci-Fi energy shield for Part 4. Initially when I spawned the particles ahead of the shield forming I ran into a happy accident. I had duplicated that emitter from a previous one used in another effect and the World Position Offset value was initially quite high. The particles were intended to just be rectangular but they had a single region of verts that went off into space. I thought that looked kind of cool and gave more intent to the dome forming so I dialed back the parameter a bit to make it look more projector-like. I also wanted the grid pattern on the dome to be fully customizable if there were to be variations for more shields, so I created a procedural grid by adding a vertical and horizontal generated band together and tiling them. Hope you enjoy it! Limitations 1. Time: Complete the FX within 3 work days max (24 Hours) (Completed) 2. Project Constraints: Blueprints only no Level Sequencer. (Completed) 3. Extreme Limitation: One texture for every part of every effect (Completed) Programs Used: Blender, Substance 3D Designer, Unreal Engine 4 Credits: Sound Design by Aaron Gallant | Character Mesh from Mixamo | Music by NeuAcre Part 1 - Campfire - https://youtu.be/b2HT9eHxg3c Part 2 - Power-Up - https://youtu.be/vdIGkIV7vnc Part 3 - Muzzle Flashes - https://youtu.be/YYbq9S2eNNU Part 5 - Exploding Barrel - https://youtu.be/okp-paH_2tw Part 6 - Ice Projectile - https://youtu.be/sxkSif5-ulQ More Details on ArtStation: https://www.artstation.com/artwork/DA2WXG
One Texture VFX Art Test -  Part 1  - Campfire
01:54

One Texture VFX Art Test - Part 1 - Campfire

I felt like a campfire was a good first art test-like effect to create. It also helped lay the groundwork for quite a few of the following effects in terms of materials and emitters. My goal was to shape the fire by creating a more mesh based effect in order to control the shape and look of the flames. This also helped with optimization from that standpoint too, as it kept away from using emitters and allowed me to tie in an ignition and dousing system into the Blueprint functionality. Thanks Chris Meredith for your guidance on that system when I got stuck. The real challenge was trying to do the flames without simulations and only rely on Unreal materials to drive them on the meshes. I learned quite a few material tricks in this one, but I’ll have to hopefully reveal those later on with a more detailed breakdown. The best part about this one was that I immediately had the opportunity to apply what I learned to a project I’m on at work. Would love to know what you think of this one in the comments below. Limitations 1. Time: Complete the FX within 3 work days max (24 Hours) (Completed) 2. Project Constraints: All effects must function via Blueprints and be showcased via gameplay without the use of Level Sequencer. (Completed) 3. Extreme Limitation: One texture for every effect (Completed) Programs Used: Blender, Substance 3D Designer, Unreal Engine 4 Credits: Sound Design by Aaron Gallant and Campfire Mesh by Zelad Part 2 - Power-Up - https://youtu.be/vdIGkIV7vnc Part 3 - Muzzle Flashes - https://youtu.be/YYbq9S2eNNU Part 4 - Energy Shield - https://youtu.be/za_N2x1ScX8 Part 5 - Exploding Barrel - https://youtu.be/okp-paH_2tw Part 6 - Ice Projectile - https://youtu.be/sxkSif5-ulQ More Details on ArtStation: https://www.artstation.com/artwork/DA2WXG
Real-Time VFX Portfolio
REBELWAY_LOGO.png
bottom of page